


Calibrate your pH and EC meter in your greenhouse
 Print
Print Email
EmailThe pH and electrical conductivity (EC) measurements are only as good as the calibration of your meter. Calibrate your meters now to prevent mistakes in your production planning.

Spring is in full swing in the greenhouse! Vegetative cuttings are being stuck, plugs are being transplanted and finished product is being shipped south where spring has sprung. In the excitement, it is easy to forget the basics such as making sure your pH and electrical conductivity (EC) meters are calibrated correctly. The measurements you take with your meters are only as good as the calibration. If your pH and EC meter provides you with an inaccurate reading, you might falsely make a management decision about your spring crop.
There are a variety of EC and pH meters on the market, but I will be demonstrating these tips using a Hanna Instruments HI 9313-6 (Photo 1). Michigan State University Extension recommends the following tips for preparing your pH and EC meter for use:
- If you have not used your pH and EC meter in a while, follow the manufacturer’s instructions on how to get it ready to go. After a long period without use, the electrode in probe of the meter will have likely dried out. I needed to soak the probe of my meter in a storage solution for a minimum of an hour (for example, HI70300 Storage solution).
- Once you have “re-wet” the probe, you will now need to calibrate the meter again. You will need to have the standard solutions that can be used with the meter to recalibrate it. For my meter, I needed the standards for the 4.01 pH and the 7.01 pH. I also needed to calibrate the EC and needed a solution with a known EC value (μS/cm) (Photo 2).

Photo 2. The standard solutions that match the meter I am using.
- Make sure your standard solutions are not expired! Frequently, we are tempted to draw out of the same bottle for years on end. Be careful, as the integrity of the solution may have changed over time. The manufacturers often sell these calibration solutions in various size bottles or convenient disposable, individually-packaged sachets.
- Rinse the electrode at the end of the probe with distilled water.
- If your standard solutions came in a larger bottle, pour the standard solution into a clean, dry container such as a small cup. If your standard solution came in an individual sachet, place the electrode directly into the packet. After inserting the electrode in the standard solution, adjust the dial to make sure your meter is reading the pH of the known standard (Photo 3). Never dip the probe directly into the larger bottle as the known pH or EC will become inaccurate over time. Also, growers should take note that the pH of the solution changes with temperature, so be sure to check the temperature of the solution before calibrations.
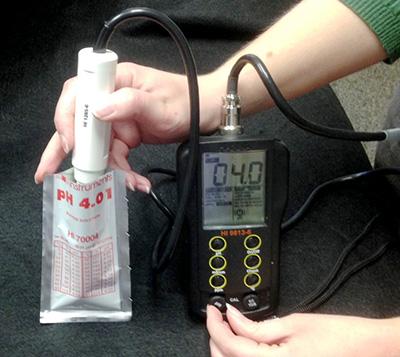
Photo 3. Calibrate your meter by turning the dial with the standard solution: 4.01 pH shown here.
- Rinse between calibrations with distilled water.
- Calibrate you meter to a known EC. Notice this meter displays the number of mS/cm, but the calibration packet lists the number of µS/cm. Remember 1.41 mS/cm is equivalent to approximately 1413 µS/cm (Photo 4).
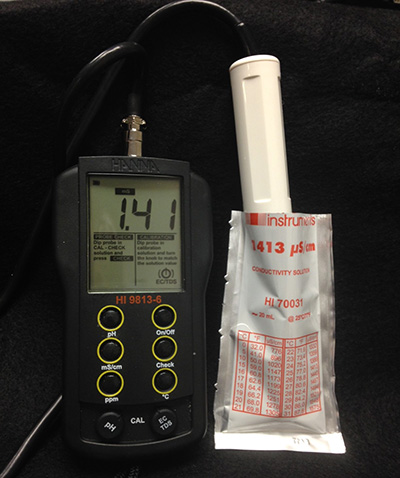
Photo 4. Calibrate the EC of your meter, noting the difference in units between the display of the EC meter and the labeled calibration solution.
- You are ready to go and measure the EC and pH of your crops!
By performing these simple steps, you will be able to detect accurately if the pH of a crop is creeping up or if the soluble salts are getting too high, for example, which can cause nutrient deficiencies and toxicities in plants. Remember, pH is based on a logarithmic scale, so a pH of 6.0 is 10 times more basic than a pH of 5.0. What appears to be small shifts in pH are actually larger than you might think and may quickly affect the nutrient uptake of your plants. Now, let’s keep growing!


